31 August 2011

One of the most frequent questions I get from y'all is about where I get the tags I use for my Etsy shop. I received inquiry #1,745 this week and finally decided that it was high time for me to put together a tutorial for y'all so my paltry efforts to explain this process in an email can be put to rest.

After all, it's important to get to put your signature on your fine sewing work!

Before I start, I feel like it's important to point out that these tags are not indestructible. They are printed with printer ink, so they will fade over time. And, I'll show you my best suggestion for keeping the edges nice, but it's possible that they will also eventually fray a bit after being washed a ton of time. Nothing is going to beat a nice woven/embroidered tag in quality and longevity. But, these printable tags are lovely and great and you definitely can't beat the price! (You can make 432 side tags for about $6.50!)

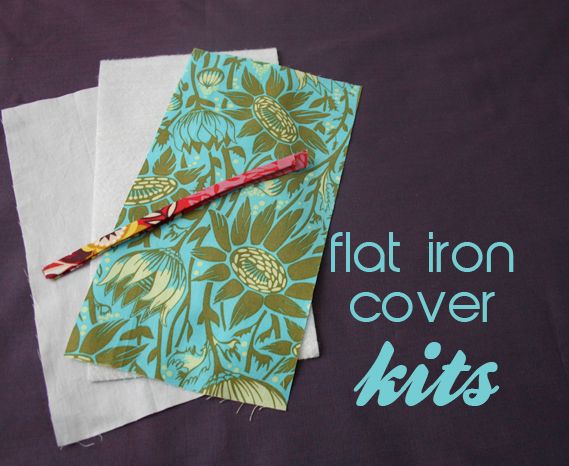
I say feel free to use them in any sewing project, though they'll last longest in items that aren't washed as frequently (oven mitts, flat iron covers, etc.). I use them on all the bibs I make because I think they are such a cute little added touch - but I just expect that a few months down the road, they'll need to be snipped off when their time to shine has passed.

Okay, that said, here is a tutorial to make your own custom sewing labels at a fraction of the price of the embroidered kind!

Photobucket

What you'll need:
*Cotton/twill printable fabric (you can get it at Jo-Ann's for about $12.99 for a 6-pack, or on Amazon you can find a 3-pack for around $6)
*Fray Check (again, available at JoAnn's or on Amazon)
*A printer
*An iron
*A rotary cutter and self healing mat (or scissors)
*A computer program in which you are comfortable designing and formatting the labels

Photobucket

I designed my labels in Adobe Illustrator, though I imagine there are other programs - even Microsoft Office programs - in which you could also make this happen. Perhaps Powerpoint or even Word?

I'm going to show y'all two different types of labels today: the mini side tag (.5" x 1.75") and the larger neckline tag (2.5" x 1" for the printed, front side of the fold).

Here is my document, ready to print:

Photobucket
And here she comes, out of the printer! (A little bluer than I'd envisioned - looks like I'm low on colored ink.)

Photobucket

The first thing you do (after giving the ink a second to dry) is peel the paper backing off of the fabric. Try to pull it off gently and evenly. I've found that you can actually warp the fabric's weave if you get too tugsy.

Photobucket

Now rinse it under cool water until the water runs clear. (I don't know why, but this is seriously my favorite part!)

Photobucket

Lay it out on a towel to dry. Do NOT wring it! (again, you just don't want to mess with the weave of the fabric - you'll thank me later.)

Photobucket

If you get too impatient, you can roll it up in the towel and give it a good squeeze. Also, a hot iron sometimes gets the last bit of dampness out if you're feeling terribly impatient. *ahem*

Photobucket

Alright, to the cutting board! (or scissors!)

Photobucket

This is the part where you'll be glad you didn't tug on your fabric. You want all your lines to be straight so you can roll right through them.

Notice that I have a block of white space beneath each image for the neck tags - I'm stingy with my ink, so I only print what will be the front sides once they're folded.

Photobucket

And here are the side tags. I put a yellow bar in the center of each tag at the fold with a different image on each side so I have options. I like options. :)

Photobucket

All cut and in a pretty little pile. The page I just printed yielded 36 side tags and 9 neck tags. I'm thinking you could get 72 side tags out of one page.

Photobucket

Now the Fray Check. Without it the cut edges will fray before you even make it to the first wash. It's a must.

You'll have to pardon these next few photos. I was losing daylight and things got a little less crisp.

Pop the top off of the Fray Check.

Photobucket

And pour a bit into a small, shallow something. I use the plastic packaging that my snaps come in from Jo-Anns. It's just the right size.

Photobucket

Dip the sides of the neckline labels and the tops and bottoms of the side tags in the fray check.

Photobucket

You don't have to dip the edges that will eventually be concealed by stitching.

Photobucket

And if you start going crazy dipping one tag at a time, line a bunch up and take them for a dip together. Just make sure everybody gets baptized.

Photobucket

And if you're worried that the fray check is going to stain your pretty labels, don't. By the time it's completely dry it will also be invisible. (You can see it drying here.)

Photobucket

Now it's time to iron. I'd wait until the Fray Check has dried completely (or at least almost completely if you're impatient like me). If nothing else, to protect your iron.

Press them in half, just like you've planned.

Photobucket

Don't they look lovely?

Don't you feel fancy?

Photobucket

Now, just press the rest and assemble for yourself a nice little cup/jar/pouch of tags with your name or logo on them and feel very grown up and professional.

And, just like giving a mouse a cookie... if you have new tags, you're going to want to make something to sew it into!

Photobucket

I made a quick pair of PJ pants for my little lover-girl,

Photobucket

one of my own little ragamuffin babies. :)

Photobucket

Have a lovely Wednesday, friends! Come back tomorrow - the blog switchover should happen tonight. So excited!

Disclosure of Material Connection: I received the Brother NX800 machine mentioned above for free in exchange for a mention of the product in my blog. Regardless, I only recommend products or services I use personally and believe will be good for my readers.

29 August 2011

Photobucket

I've only been to one garage sale in the past two weeks.
Shame on me.

And this sale was hosted by my girlfriend who is making a move across town. I was bummed to hear when I arrived at 8:00 that folks had been flooding her sale for three hours already. Unreal! Even for me...

I picked up just a few things, but they were happy finds, so I'll share:

$0.50 - J.Crew green long sleeved shirt - wore it with white shorts later that day and I was a happy girl.
$0.25 - long-sleeved shirt for Oliver for school. Nothing fancy, but he always looks good in blue and brown.

Photobucket

$5.00 - Really pretty (and practically new) turquoise shoes. I am headed to my cousin's wedding in Michigan in a couple of weeks and I'd already bought my dress but no shoes. These will go beautifully. You can imagine Ryan's delight when he understood the alternative of shoe shopping and purchasing. :)

Photobucket

$3.00 - Cool leather purse - Yes, it's a little worn, but I've admired this purse on Katy for a long time and I was thrilled to get to add it into my purse rotation. I love the look of it and the way it fits on my shoulder.

Photobucket

Like I said, nothing fancy. But, I definitely couldn't have beaten $5 for wedding shoes and I like my new bag.

Fall yard sale season will be starting soon and all the neighborhoods will have big group sales again. I'm enjoying taking easy on these blazing hot days and will hit the sales a bit harder in the next couple of weeks.

28 August 2011

Photobucket
1 . 2 . 3 . 4

Have a lovely Sunday, friends! And give that chicken salad a try - it's been a summer staple around our house!

26 August 2011

I woke up with a million things whirling through my mind this lovely Friday morning and I thought I'd share them here.

1} First, thank you all for your great advice and encouragement and information on yesterday's post. Wow, it's so great to hear from such a number of different people with different experiences. I'm totally going to order a potty chair and give it a whirl for Hazey. I'm thinking this one by Hoppop since it's small (for our tiny girl) and gets such great reviews. Anyone know anything about it?
Photobucket
Also, suggestions for lovely, functional and appropriate undies for a 17-month old would be grand!

2} I have been sewing like a crazy lady these past two days - thanks to all y'all's wonderful support for the flat iron covers. You're keeping me busy and I'm thrilled!

Photobucket

As you may know, Ry's running a marathon in Chicago at the beginning of October (just a few days after his birthday) and I really wanted to treat him to air travel (versus 16 hours of car travel) for his birthday weekend. Looks like that might be a real possibility - like my friend Keight said, "You're sewing your way across the skies!"

2.1} I did want to let y'all know that I had to raise the price of the covers to $12 after considering all the additional time of cutting, communicating, packing and shipping. I'll still do 2 for $20 and anything that communicated with me about them before today will still get the $10 price.

2.2} Glad y'all liked the kits too. I'll try to make those available for future tutorials as well, if you like. Any interest in kits for the camera strap covers?

3} Last night I went running with Ryan for the very first time ever. Audrey was at home with our sleeping babes, so we took off at around 9:30 and ran just over 6 miles. I wasn't sure I'd like running with a buddy, but it was like a fun date to run in the cool darkness from streetlight to streetlight, chatting and laughing and running through sprinklers like giddy children. He makes my heart skip every single day.

4} Speaking of running, we are now 9 days away from my very first race ever. We're running a 10K in the Franklin Classic on Labor Day to support Mercy Children's Clinic. Any of you locals going to be running?

5} Speaking of the Franklin Classic, we're signing Oliver up for the 1K (.62mi) race. I have been taking him out for his little runs and he's doing great - he can run the whole distance without stopping to take a break or tell a story (both issues at first). He's so excited!

5.1} Oliver's running buddy with be our good friend (and cousin-in-law) Olivia. She's on the FMF St. Jude team, but about 4 weeks ago she and her husband were involved in a terrible propane grill explosion. Their burns were mostly on their legs (praise the Lord!), but were pretty severe (2nd and 3rd degree) and she was unable to walk for a couple of weeks. Her doctor has given her the go ahead to start running very carefully beginning in September, so her race with Oliver will be her first run since the accident. Not only is O excited to have Miss Olivia run with him, but we're excited to celebrate God's faithfulness with Olivia as she recovers and hits the pavement again.

5.2} Speaking of the Franklin Classic (yes, one more), the Dukes' are coming up for the weekend to run with us! Totally preparing my ego to be smoked by Jesse, but that's okay. It's for a good cause. :)

6} Again, speaking of the Dukes': we made a quick trip to Atlanta a few weeks ago to visit them, eat good food, shop good shopping and generally have a lovely time. Here we are at brunch on Sunday:

Photobucket

7} On an unrelated note, I ordered these cool red tag letters on sale for $.25/each from the Land of Nod earlier this month. 10 O's and 10 H's. I'm planning to tie them to our babes' Christmas gifts this year - it will be fun for them to spot their letters under the tree!

Photobucket

8} Some very exciting news: I have found a wonderful programmer who has taken over my blog redesign (Ry was just way to busy to do it for me) and I'm so stinking excited! Want an itsy bitsy sneak peek?

Photobucket

There. That's all you get right now. I'm in love with it and I hope y'all will be too! Planning (hoping) on a launch date of September 1st, barring any big hiccups. That's only six days away. Nobody panic!

9} Speaking of the ol' blog: with the redesign I have also revamped my sponsorship options to include a wide-range of choices. If you're interested in advertising with me, shoot me an email and I can send you more information!

10} I get to keep my sister's 3 oldest kids this afternoon while she holds auditions for her school's fall play. I love getting our kids together (especially when they're all healthy all at once!) and observing all the funny little dynamics they have. Hazel and Mosey are so surprisingly similar and they play well together.

Also, I'm doing my best to pay into the bank of childcare with my big Sissy so we can leave O&H with her when we go to Chicago. :) She takes good care of me.

11} One final exciting thing, then I'll set y'all loose for your Fridays! I've been working on putting together Audrey's new bedroom upstairs in our house and it's so much fun. It doesn't have to be an adult room but it doesn't have to be a kid's room either. I get to make a room for an 18-year-old with all kinds of interesting details and quirks and colors. Audrey has been very gracious to move into an unfinished room, set me loose in there, and move furniture out of the way as necessary. 2 weeks from now we should be all set and ready for the reveal. In the meantime, I'm headed to the lumber store!

I will leave you with a little peek at one of the projects I just finished for the room:

Photobucket

I know I told you a thousand things and asked you a hundred questions in this post. 10 points if you hung with me to the end!

Happy Friday, friends!

25 August 2011

Photobucket

Okay, so this girl is throwing me for a loop. Again.

All week she's been trying to take off her diaper whenever it's dirty (and unfortunately, one "successful" attempt in her crib last week ended with poo all over the crib, her hands, her face... but I digress).

Yesterday she came to me in a dry diaper, trying to pull it off and saying "potty! potty!" (honestly, I don't even really remember teaching her that word. Maybe Oliver did?)

This morning she started following me around with a pack of wipes and pointing to her diaper saying "poopy". I didn't even take her seriously because, again, I've never had this "talk" with her. Evidently someone has though because I checked, on the outside chance that she may be dirty, and sure enough, she needed to be changed.

So.

The child took 15 months to walk, but is maybe showing signs that she's ready to potty train at 17 months? Seriously - walking for only two months and now this?

I potty trained Oliver when we turned two. It took about two months for him to be accident-free, but still, that's 7 months from now.

When did y'all potty train your kids? Should I give it a whirl? Am I over-thinking these "signs" and just setting myself up for frustration?

I know there are a ton of smart Mamas out there - y'all have given me lots of good advice in the past. So, what do you think? Heed her cues or write them off as a fluke?

24 August 2011

Good morning, friends!


I just wanted to let you know that I decided to put a few kits up in my Etsy shop today to make the Flat Iron Cover tutorial.

This way, if you don't want to go out in search of Insul-Bright or if you want pretty fabric but don't want to bother buying yardage, you can just order all the components pre-cut and ready to roll! I'll even make your bias tape for you. Easy peasy!

Photobucket

Here are a some of the fabrics I have here in my sewing room that you can pick from. (Christine, did that sentence just make you cringe?)

Anna Maria Horner:
Photobucket

Valori Wells:
Photobucket

Heather Bailey:
Photobucket

The kits are $4 plus shipping (I think I can get them shipped for around $1.80) and include:
1 - 11"x6" piece of pretty fabric
1 - 11"x6" piece of Insul-Bright
1 - 11"x6" piece of white cotton muslin
1 - 6" long piece of 1/2" double fold bias tape

Also, this week only, I'll make flat iron covers and sell them in my Etsy shop for anyone who asks nicely. (But it's really fun to make them yourselves!!) Cost is $10 + $2 shipping.

(Think what a lovely gift this would make for a college student living in the dorms!)

Have a lovely Wednesday, friends!

23 August 2011

I am so excited to share a quick and easy tutorial with y'all today! (And I do mean quick - after I shot the tutorial I did a time trial to see how fast I could make one without pausing to take photos of each step. Working at a normal, relaxed pace I completed the project in 9 minutes and 7 seconds. Told you it was quick!)

Quick but also super useful. You'll use this every day (if you use a flat iron or curling iron every day) and it's especially handy if you're traveling or going to the gym because you won't have to wait for your iron to cool before packing it away.

Y'all, I'm so pleased to share with you, my quick and easy Flat Iron Cover Tutorial!

Photobucket

What you'll need:
11"x6" pieces of the following three fabrics: Insul-Bright, pretty cotton fabric (for outside), and plain cotton fabric (for inside)
{I used Sugar Pop Summer Flowers from Sew Fresh Fabrics for my main fabric}
You'll also need about 7" of 1/2" double fold bias tape - buy some or make your own
Coordinating thread
Tailor tape

Photobucket

You'll also need a sewing machine. You know I'm rather attached to mine. :)

Photobucket

Getting Started:
Using your tailor tape, measure the circumference of your flat iron (or curling iron) at the widest point. Also measure the length.
Photobucket

Now, if you have a Chi, the work has been done for you. You can use my measurements. If not, I'll show you how I did my work so you can adjust yours accordingly.

Photobucket

A few notes about my notes: after I made these notes, I adjusted the width of the cut to 6" instead of 5.5" and it's good that I did - I needed that extra wriggle room. Also, I suggested the use of home decor fabric on my notes - that's probably the very best (I made one about a year ago with home decor fabric and it's been great and kept the warm inside), but quilting weight fabric will work as well. The Insul-Bright is good stuff.

Now, cut your three pieces to the size you've determined. And we're on to the quilt sandwich!

Photobucket

Lay your three fabric pieces in a stack, plain cotton first, then Insul-Bright, then your pretty fabric (right side facing up) and pin in place.

Now, quilt your cute little stack. Beginning on the right side, stitch several lines, each 1/2" from the next to make your quilt sandwich all one piece.
Photobucket

You may need to square things up when you're finished if your pile shifted at all.

You're already halfway finished!

Photobucket

Now take your piece of bias tape. Open it up and tuck one of the short ends of your quilted piece into the crease of the bias tape. Stitch the bias tape onto your quilted piece, close to the end. (You're only catching one side of the bt this time.)
Photobucket
Now fold the bias tape up and over your quilted piece and stick it in place. (I like to stitch each side individually so I can be sure that nothing gets missed and the stitch that shows is a strait and sure one.)
Photobucket
Seriously, almost done. Yay!

Photobucket

Just fold your piece lengthwise, right sides together. Stich across the top and down the side, with a 1/4" seam allowance.

Photobucket

Trim the excess off the corners, then turn it right side out (a dowel rod or pencil are both useful for this maneuver).
Photobucket
And...

Photobucket

It's all pretty and tidy AND functional!

Photobucket

Just slip it on your hot flat iron and run! Hurrah!

Photobucket

As with all of my tutorials, you are completely welcome to use this tutorial to make items for sale in your Etsy shop or at craft fairs and such. I'd love it if you would share a link back to your source (me!) and I always love to see what y'all make with my tutorials, so please share them here!

Have a lovely Tuesday, friends! What are y'all up to this week?

**Update** For a limited time I am selling flat iron cover kits in my Etsy shop. I am also taking custom orders for flat iron covers this week only. More details here.

Disclosure of Material Connection: I received the Brother NX800 machine mentioned above for free in exchange for a mention of the product in my blog. Regardless, I only recommend products or services I use personally and believe will be good for my readers.